Soldering Guidelines for Preweathered Zinc Gutters
This manual contains technical and theoretical knowledge as it pertains to soldering Preweathered Zinc Gutters and explains the practical application using illustrations and text.
1. General Definition of Soldering
Soldering is an impervious, solid connection of metal materials made by melting metal fillers, the solder, whereby the base materials to be joined, remain solid. The melting temperature of the solder must be below the melting point of the base materials. There are two types of soldering:
a) Soldering Distinguishing feature: the soldering temperature is below
842 F (450 C) and is therefore perfectly suited for Preweathered Zinc
b) Brazing Distinguishing feature: the soldering temperature is above 842 F (450 C) and is therefore not suited for zinc! (the melting temperature of zinc is 784 F, 418 C).
2. The Benefits and Properties of Soldering Preweathered Zinc Gutters
- Quick and simple work method
- A fully-bonded connection (tensile and transverse strength), thus no additional riveting is required (the strength is the same as the base material)
- Watertight connection - Corrosion resistant
- A permanent durable joint
- No change to the structure or strength of the base Preweathered Zinc material
- No negative impact on bordering materials. Thus, soldering is a quick and simple method to create a watertight, fully-bonded and durable joint. A properly executed soldered joint is as strong as the base Preweathered Zinc material! The strength of the soldered joint is achieved by joining the tin solder with Preweathered Zinc at the contact surfaces through the formation of an alloy.
3. Tools and Equipment for Soldering Preweathered Zinc Gutters
1 Flux ZD-pro
2 Solvent-pro by Felder
3 Sal Ammoniac Block
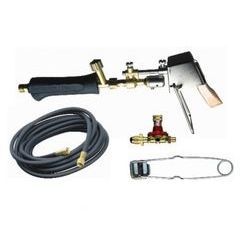
4 Small Gas Bottle and Hose
5 Pointed Soldering Bit
6 Hammer Shaped Soldering Bit
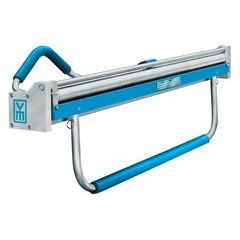
7 Soldering Iron on Support
8 Brush for Flux
9 Solder Bar
10 Wire Brush
11 Deburring Tool
* ZD-pro is the recommended flux as it was formulated for use with Preweathered Zinc. While other fluxes will work, they should first be tested on a scrap piece of Preweathered Zinc to ensure that a sufficient bond is achieved.
3.1. Soldering Bit
A hammer-shaped soldering bit (hammer bit) weighing 1.1 lb (500 g) but min. 3/4 lb (350 g) is recommended. Its weight guarantees optimum heat storage without overheating. A wide supporting surface (hammer edge) guarantees quick and even heat transfer to the soldering area (the entire overlap area). This is an important feature, as the solder will only flow to areas where there is sufficient heat.
Pointed soldering bits should only be used in areas, which are inaccessible for the hammer bit!
3.1.1 Maintaining the Soldering Bit
In order to ensure that the soldering bit maintains its proper thermal conductibility, the soldering bit (lateral surface and hammer edge) must be filed regularly. From time to time it can also be necessary to forge the bit back into its proper shape, beforehand.
3.2 Tin Solder
For tin solder, Preweathered Zinc recommends soldering sticks comprising 40 % tin and 60 % lead. In isolated cases, tin solder comprising 50 % tin and 50 % lead can also be used.
The percentage of antimony (metal fillers) must be less than 0.5 % weight. Use tin solder according to DIN ISO 9453. The soldering sticks have the following markings:
3.3 Flux or Soldering Fluid
Recommendations on using ZD-pro flux. It was made specifically to accommodate the properties of Preweathered Zinc. ZD-pro strips oxide residue as well as residual rolling emulsion. This allows the solder to flow quickly and completely into the gap, resulting in a thorough alloy formation and a solid and durable soldered joint! While other fluxes will work, they should first be tested on a scrap piece of Preweathered Zinc to ensure that a sufficient bond is achieved.
3.4 Solvent for Preweathered Zinc Gutters - Material
In order to solder Preweathered Zinc, the temporary layer of organic surface protection, which was applied at the factory, must be removed before the flux is applied. This does not apply to bright-rolled and, preweathered pro blue-gray material!
Two methods can be used to remove the pro layer:
- apply ZD-pro solvent
- manually remove using scouring pads or stainless steel wool.
4. Requirements of a Soldered Joint
4.1 Overlap of Soldered Joint
The pieces to be joined must be soldered with an overlap of 3/8" 5/8" (10 mm 15 mm). The established overlap must be thoroughly soldered, i.e., bonded strong and entirely filled with solder! It is very difficult to solder larger overlaps.
4.2 Soldering Gap
The gap should be kept as small as possible and never more than 0.020" (0.5 mm), as the capillarity (=capillary tube-attraction) decreases, the greater the soldering gap. Consequently, neither flux nor solder can penetrate the gap sufficiently.
Note:
The narrower the gap, the better the capillary force (= inflow capability), which allows the subsequent alloy formation in the gap to be consistent resulting in a denser, stronger soldered joint!
4.3 Soldering Temperature for Preweathered Zinc Gutters
480 F (250 C) is the optimum soldering temperature to solder Preweathered Zinc using the recommended tin solder L-PbSn40 (Sb) (respectively 40/60). This must be the temperature of the soldering bit and, even more importantly, this temperature must be maintained during the soldering process in the overlap area. In order to guarantee effective heat transfer from the soldering bit onto the Preweathered Zinc Gutter in the overlap area [gap], the weight, the shape, and the way in which the soldering bit is guided, must be selected according to the recommendations of these guidelines and must be commensurate with the soldering speed! Soldering temperatures, which are too low or too high, result in weak and brittle soldered joints or, respectively, melted material! (see no. 8 Frequent Sources of Error)
Note:
The correct temperature of the soldering bit can be checked with a sal ammoniac block (see 5.5). The use of propane gas is recommended in order to ensure optimum temperature control of the soldering bit.
4.4 Guiding the Soldering Bit
The soldering bit must always be pressed flat against the entire overlap area and guided along the overlap at the right speed. This allows the necessary heat from the soldering bit to be transferred to the overlap area. The tin solder will be melted at the tip of the bit, and will be absorbed into the gap through capillary suction force.
5. Step by Step Instructions for Soldering a Preweathered Zinc Gutter
5.1 Tinning the Soldering Bit
Prior to start soldering the smooth hammer edge and the lateral surfaces must be cleaned and tinned to minimize oxidation. If necessary, file or forge the bit beforehand (see 3.1.1). A properly tinned bit facilitates the soldering process considerably and is an important prerequisite for a properly soldered joint! Clean the bit using a wire brush. This removes any oxidized material, which would otherwise decrease thermal conductivity considerably. Tin the soldering bit on a sal ammoniac block. Heat the soldering bit to ~480 F (~250 C) and cover the tip of the bit with liquid solder. Tinned tip of soldering bit.
5.2 Deburring the Material
Debur the edges of the overlap area to create a narrow soldering gap!
Options:
- Apply solvent to the contact surfaces of the overlap area.
- Rub off using a scouring pad or stainless steel wool.
5.3 Removing the pro layer
This is only required if Preweathered Zinc is being used!
5.4 Apply ZD-pro flux
Apply flux to the contact surfaces of the overlap. Create an overlap of 3/8"- 5/8" (10 -15 mm). Apply flux to the overlap.
5.5 Check Temperature of Soldering Bit
In order for soldering to be successful, the temperature of the soldering bit must be ~480 F (~250 C). Check the temperature of the soldering bit by rubbing it on a sal ammoniac block! Optimum temperature: slight smoke formation - Too hot: strong smoke formation - Too cold: no smoke formation
5.6 Soldering of a Preweathered Zinc Gutter
Applying steady pressure on the overlap with the soldering bit and the solder bar. Guide the bit slowly along the soldered joint. Use auxiliary tools to apply pressure to the overlap (e.g. piece of wood) for areas that are difficult to access. From time to time, add a little solder by melting it on the tip of the bit. (As soon as solder has been added, move the bit back just a bit. This will prevent the unsightly formation of solder nests). Exerting pressure, place the soldering bit full-surface onto the overlap (see 4.4). Once the material has reached ~480 F melt some solder on the tip of the bit.
5.7 Cleaning the Soldered Joint
Clean the soldered joint using a damp cloth. This will remove corrosive flux residue and carbon.
5.8 Checking the Soldered Joint
The overlap area must be completely filled with solder and must have bonded! At no point, can the gap be greater than 0.020" (0.5 mm)! In the event of a defective soldered joint, it must be reopened and steps 5.4 to 5.8 must be repeated. The indication of a properly soldered joint is a narrow soldered gap and, on the back, emerging solder over the entire length of the joint! This is the indication of a completely filled overlap area (gap), the basis for a strong joint.
6. Soldering Vertical Joints
To solder vertical joints, the same steps as illustrated in Section 5 should be used. Therefore, only the actual soldering process is noted here. Exerting steady pressure with the soldering bit, solder the vertical up-weld from top to bottom. If necessary, fasten the joint beforehand in small increments using spot soldering (tacking).
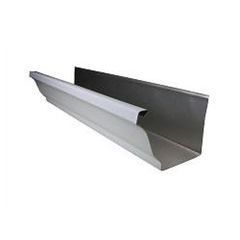
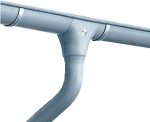
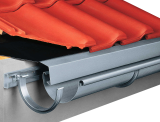
7. Soldering Preweathered Zinc Gutter Systems
To solder Preweathered Zinc Gutter products, the same steps as illustrated in Section 5 should be followed. Therefore, only the actual soldering process is noted here. Begin soldering the gutter joint at the gutter bead and exert pressure while slowly drawing the soldering bit over the joint. Continue along the soldered joint up to the water check.
7.1 Soldering Preweathered Zinc Gutter Pieces
7.2 Soldering Gutter End Caps
Slip on the end cap. Fasten the end cap using spot soldering. Completely solder the end cap from the bead to the water check.
8. Frequent Sources of Error
8.1 Weak and Brittle Soldering Seams
Possible sources of weak and brittle seams are in the main:
a) Soldering gap was too big (> 0.020" (0,5 mm))
b) Not enough flux has been used
c) The pro layer has not been removed properly
d) Not enough solder has been used
e) Soldering bit was too cold (< 480 F (< 250 C))
f) Soldering was done too quickly
g) Soldering bit was too light or the tip to small In the case of f) and g), the required soldering temperature ~480 F (~250 C) does not reach the overlap area, even if the temperature of the soldering bit is where it should be! (see 4.3) These circumstances result in a missing formation of the bonding alloy of Preweathered Zinc Gutters and the solder! Therefore the seam becomes weak and brittle!
8.2 Melt-Through of the Material
If a lot of smoke is formed when the temperature of the bit is tested on the sal ammoniac block (see 5.5), the soldering bit is too hot (> 480 F (> 250 C))! The result melt-through of the material.
 Contractors
Resources/Blog
FAQ's
Press
About Us
Contact
Contractors
Resources/Blog
FAQ's
Press
About Us
Contact